Post by kyubinaruto on Oct 12, 2005 11:39:10 GMT -5
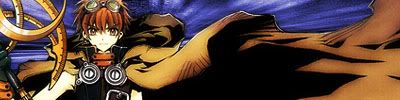
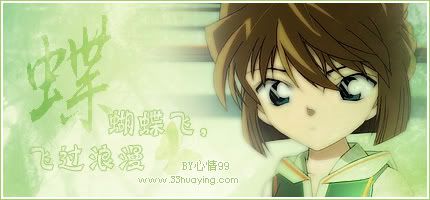
Okay, I took this PNG from aethereality.net so all credits for the image goes to them. This is the original picture I used.

All right everybody, this is going to be lengthy. Get your photoshop 7 (or better) ready!
First step: Crop & Resize (unless you want to get a huge sig. Yes. CROP)
I do not advise in putting scans in the middle of the signature. Unless you're a pro and do not want to add any text on it (Well, that's stupid. A sig should have a text), DO NOT DO IT!
Well, I got this
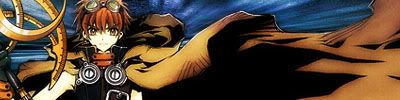
Step 2: Clean the scan
I saw that my original scan was grainy and I don't like my scans grainy or blur. Actually, I always do this when I clean my pictures.
It's a short cut way to erase most of the grains without vectoring. This way gives a nice and smooth effect on my scan as well. Wallers usually use this method but sometimes it doesn't work well with signatures and avatars because it's too small and unappropriate blurring will ruin the whole scan
1. Duplicate the layer [Ctrl+J]
2. Set the top layer to Soft light/Overlay/Screen/basically anything else. In this signature, I used Overlay
3. Blur that same layer
Filter ----> Blur ----> Gaussian blur.
In this sig, I used 9 pixels. You can always use higher or lower. I always vary my range from 1-30 It really depends how you want your picture to look like.
and I got this

Credit goes to: imanimetions.net for the original technique
Step 3: Creating the background
This is what I do for this sig (Disclaimer: I didn't copy this from a tutorial)
1. Create a new layer and put it BELOW the scan. Set your colour pallete to the ones you want. I forgot what colour I used but it's along the line of #7A7C6C and #456062
2. Filter ---> Render ---> Cloud
3. Create a new layer or simply duplicate the layer and move it below the cloud layer.
4. (Somehow along they way I think I changed the colour because I was doing a layout for moonlight rhapsody but it's along the line of #3C3C8F) and repeat step 2.
5. Filter ---> Pixelate ---> Mezzotint
I used long lines.
6. Long lines are ugly XD So I radial blurred it.
Filter ---> Blur ---> Radial Blur
Use this settings
Blur method: Zoom
Quality: Good
Amount: 100
7. Set the layer with clouds to overlay
8. This step is optional but I don't like the blur coming from the centre. So I optimized it to my liking and make it so that the blur is coming from behind Syaoran
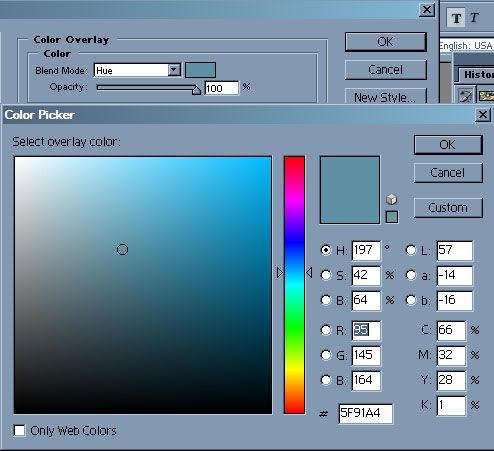
Step 4: Working with colours
I used this colour 3E4F6B and 606C93. Cloud and set the layer blending to hue
I got this
All right. We're almost complete but it looks to plain.
Step 5: Working with colours.. again
1. At the layer pallette, u click on this
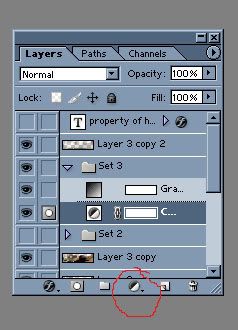
and choose color balance.
I used this settings:
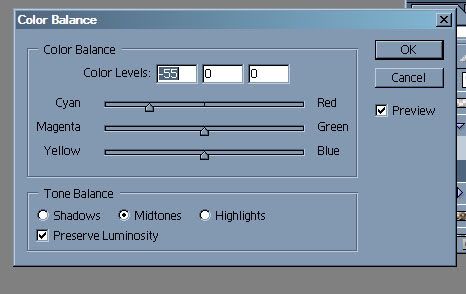
Note that I only changed the Cyan.
2. Move this layer right on top
3. Click on that same button again
but this time click on gradient.
I wanted a sandy effect so I used this colour #B49A75 and a transparent one.
Move this layer ABOVE the color balance layer
I got this

Step 6: Working with text
I chose this text Base02 and can be downloaded at dafont.com
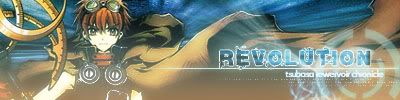
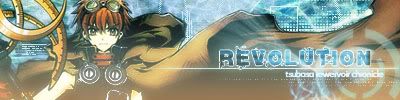
1. Make a new text layer and place it below the two effects - color balance and gradient. As you can see, for this sig, I chose the text REVOLUTION
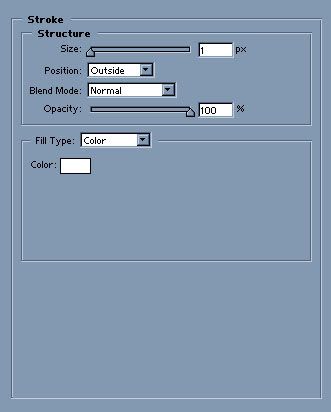
2. Double click on the layer and use these settings

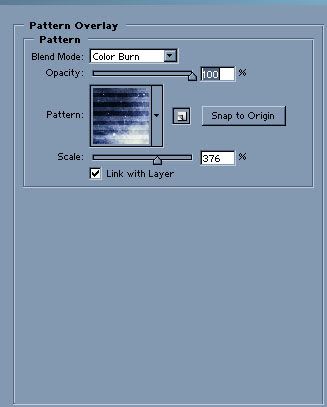 For the pattern used, I use this pattern
  I forgot who make this but it's definitely not mine
3. Now on to writing the text Tsubasa Reservoir Chronicle. Make a new text layer and type whatever you want. I used white colour but it seems a little bit cyan. Ignore it, it's due to the influence of the color balance layer.
4. It's almost complete. The text layer I mean but it's still too plain. So I used some of my brushes and get a line and the bulls eye sign.
I have no idea where I got this brush as it is quite a long time ago. Thanks a lot to whoever make it!
For the purpose of this tutorial, I came out with a way that would produce an effect close to this!
First, you create a new text layer and create a line with __________ Simple nee? For this layer, I simply outer glow it and kept the original setting.
Second, the bulls eye sign, there's something similar to it in the custom shape tool. Just scroll down I lowered the opacity to make it transparent
Third, the light burst effect. It's also a brush but you can use Shinta's light burst tutorial and distort it to get the desired effect.
After that, you should get something similar to this
Last step: Brushing
Create a new layer and place it BELOW the scan layer unless you want your brush all over your scan and ABOVE the background layer (You won't be able to see any changes if you put it below)
For this sig, I used quite a lot of various brushes and most of it can be found at Greycobra Happy downloading ^^
After I got my brush ready, I'll just start brushing using white colour which turned cyan due to the color balance layer. Do remember that brushing is not very easy after all. I did quite a lot of distorting / changing perspective and many other stupid things. I redid the brushing layer quite a few times as well to get the desired effect.
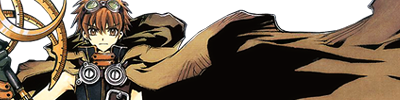
When you're done, you should get something like this
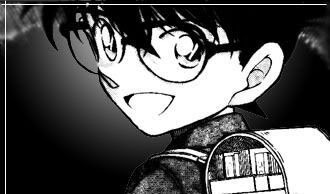
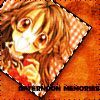
I really like my new sig and ava. Do you? XD
For more graphics, do visit Moonlight Rhapsody although it's STILL under construction
*pants* I guess this is my FIRST and LAST tutorial unless people request XD I wasted quite a lot of my space ---> 700kb total! And of course, time XD Running late! better run b4 Honeysweet-sama smack me again
All right everybody, this is going to be lengthy. Get your photoshop 7 (or better) ready!
First step: Crop & Resize (unless you want to get a huge sig. Yes. CROP)
I do not advise in putting scans in the middle of the signature. Unless you're a pro and do not want to add any text on it (Well, that's stupid. A sig should have a text), DO NOT DO IT!
Well, I got this
Step 2: Clean the scan
I saw that my original scan was grainy and I don't like my scans grainy or blur. Actually, I always do this when I clean my pictures.
It's a short cut way to erase most of the grains without vectoring. This way gives a nice and smooth effect on my scan as well. Wallers usually use this method but sometimes it doesn't work well with signatures and avatars because it's too small and unappropriate blurring will ruin the whole scan
1. Duplicate the layer [Ctrl+J]
2. Set the top layer to Soft light/Overlay/Screen/basically anything else. In this signature, I used Overlay
3. Blur that same layer
Filter ----> Blur ----> Gaussian blur.
In this sig, I used 9 pixels. You can always use higher or lower. I always vary my range from 1-30 It really depends how you want your picture to look like.
and I got this
Credit goes to: imanimetions.net for the original technique
Step 3: Creating the background
This is what I do for this sig (Disclaimer: I didn't copy this from a tutorial)
1. Create a new layer and put it BELOW the scan. Set your colour pallete to the ones you want. I forgot what colour I used but it's along the line of #7A7C6C and #456062
2. Filter ---> Render ---> Cloud
3. Create a new layer or simply duplicate the layer and move it below the cloud layer.
4. (Somehow along they way I think I changed the colour because I was doing a layout for moonlight rhapsody but it's along the line of #3C3C8F) and repeat step 2.
5. Filter ---> Pixelate ---> Mezzotint
I used long lines.
6. Long lines are ugly XD So I radial blurred it.
Filter ---> Blur ---> Radial Blur
Use this settings
Blur method: Zoom
Quality: Good
Amount: 100
7. Set the layer with clouds to overlay
8. This step is optional but I don't like the blur coming from the centre. So I optimized it to my liking and make it so that the blur is coming from behind Syaoran
Step 4: Working with colours
I used this colour 3E4F6B and 606C93. Cloud and set the layer blending to hue
I got this
All right. We're almost complete but it looks to plain.
Step 5: Working with colours.. again
1. At the layer pallette, u click on this
and choose color balance.
I used this settings:
Note that I only changed the Cyan.
2. Move this layer right on top
3. Click on that same button again
but this time click on gradient.
I wanted a sandy effect so I used this colour #B49A75 and a transparent one.
Move this layer ABOVE the color balance layer
I got this
Step 6: Working with text
I chose this text Base02 and can be downloaded at dafont.com
1. Make a new text layer and place it below the two effects - color balance and gradient. As you can see, for this sig, I chose the text REVOLUTION
2. Double click on the layer and use these settings
For the pattern used, I use this pattern I forgot who make this but it's definitely not mine 3. Now on to writing the text Tsubasa Reservoir Chronicle. Make a new text layer and type whatever you want. I used white colour but it seems a little bit cyan. Ignore it, it's due to the influence of the color balance layer.
4. It's almost complete. The text layer I mean but it's still too plain. So I used some of my brushes and get a line and the bulls eye sign.
I have no idea where I got this brush as it is quite a long time ago. Thanks a lot to whoever make it!
For the purpose of this tutorial, I came out with a way that would produce an effect close to this!
First, you create a new text layer and create a line with __________ Simple nee? For this layer, I simply outer glow it and kept the original setting.
Second, the bulls eye sign, there's something similar to it in the custom shape tool. Just scroll down
 I lowered the opacity to make it transparent
Third, the light burst effect. It's also a brush but you can use Shinta's light burst tutorial and distort it to get the desired effect.
After that, you should get something similar to this
Last step: Brushing
Create a new layer and place it BELOW the scan layer unless you want your brush all over your scan and ABOVE the background layer (You won't be able to see any changes if you put it below)
For this sig, I used quite a lot of various brushes and most of it can be found at Greycobra Happy downloading ^^
After I got my brush ready, I'll just start brushing using white colour which turned cyan due to the color balance layer. Do remember that brushing is not very easy after all. I did quite a lot of distorting / changing perspective and many other stupid things. I redid the brushing layer quite a few times as well to get the desired effect.
When you're done, you should get something like this
I really like my new sig and ava. Do you? XD
For more graphics, do visit Moonlight Rhapsody although it's STILL under construction

*pants* I guess this is my FIRST and LAST tutorial unless people request XD I wasted quite a lot of my space ---> 700kb total! And of course, time XD Running late! better run b4 Honeysweet-sama smack me again


 O.o....... nice tut. Maybe I'll try this one later. TNX for this tutorial ;D

 I think I forgot a few steps like creating new layers.
 AHAHA so confusing..... need help....