|
|
Post by ssbutterfly on Jun 24, 2006 6:46:21 GMT -5
LightningStep 01 - Create a new document. 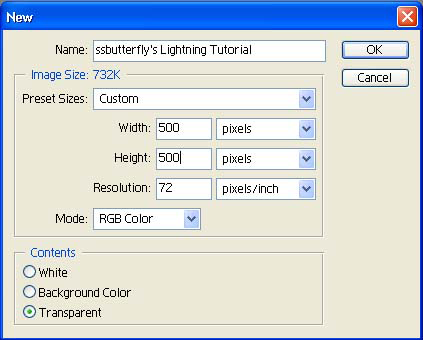 Step 02 - Open the gradient tool and set it to "Foreground to Background" (the first gradient). 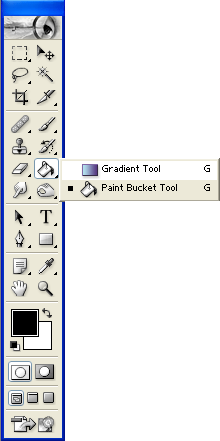 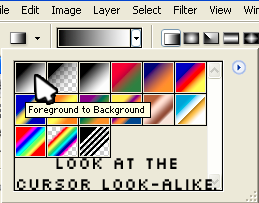 Step 03 - Press "D" to reset the colors to default. Step 04 - Make a line from either the (upper-left to lower-right) or (upper-right to lower-left). 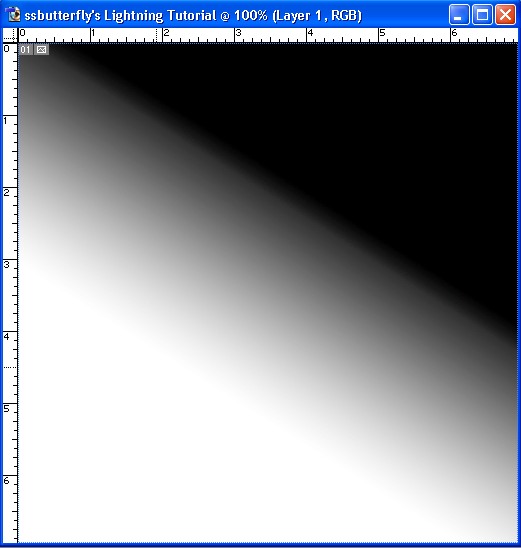 Step 05 - Go to "Filters" --> "Render" --> "Difference Clouds".  Step 06 - Go to "Image" --> "Adjustments" --> "Invert" or just press "Ctrl + I". 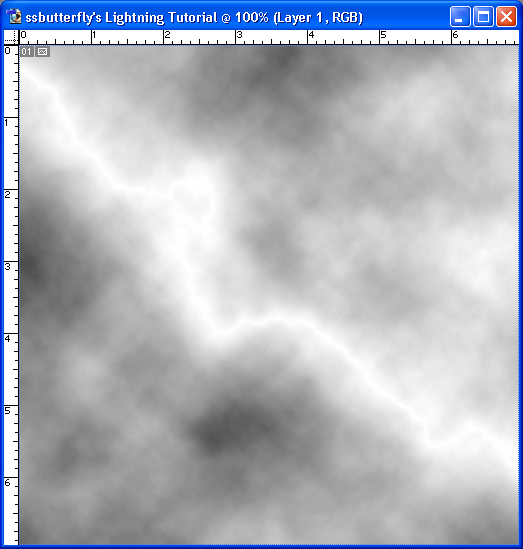 Step 07 - Go to "Image" --> "Adjustments" --> "Levels" or press "Ctrl + L". Step 08 - Toy with the settings to get your "desired" lightning, I'll go with what's shown in the image. 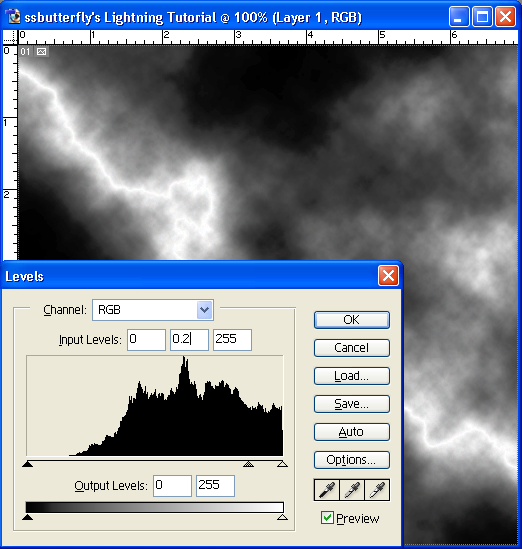 Step 09 - Go to "Image" --> "Adjustments" --> "Color Balance" or press "Ctrl + B". Step 10 - Play with the colors 'til you find what you want. 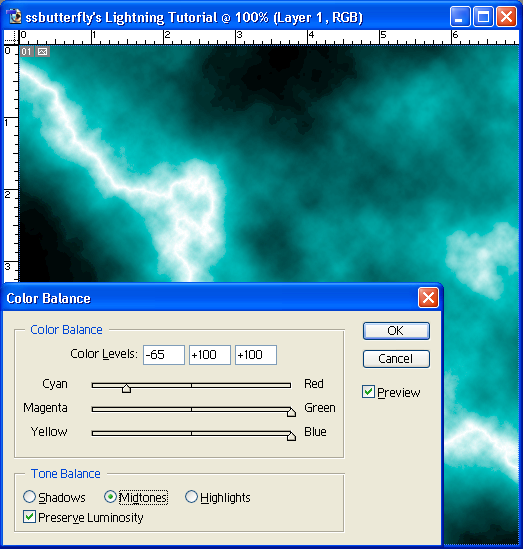 A sample of the results? 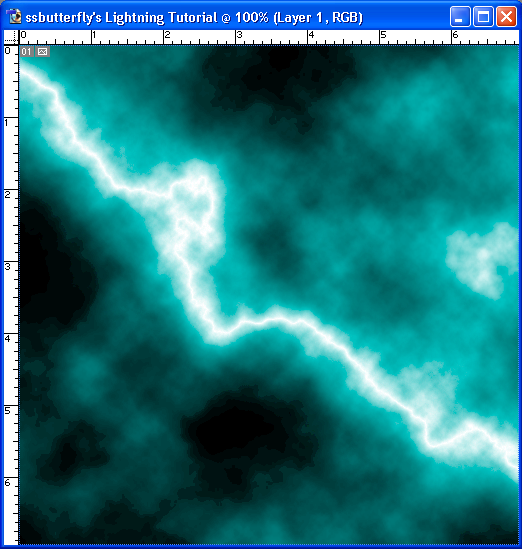 Edit* Edited so that the pictures are there... (I hope the mods don't mind...) If you want to overlap multiple lightning bolts, see www.photoshopcafe.com/tutorials/lightning/lightning.htm, I hope this was useful to you! 
|
|
|
|
Post by Mizuhara on Jun 24, 2006 17:36:24 GMT -5
wooow..thanks..for once, mines actually worked  heres the final result...but the left side is a bit dark..how can i add more than one strike of lightning? sig i made with this effect...'  really cool tutorial...do u have any other good effects? |
|
|
|
Post by Haibara on Dec 3, 2006 5:53:59 GMT -5
arigatou!
|
|
|
|
Post by Chugoku-jinko on Dec 3, 2006 5:55:48 GMT -5
please don't bump old threads
|
|