|
|
Post by *~NiCkY~* on Nov 14, 2006 23:58:58 GMT -5
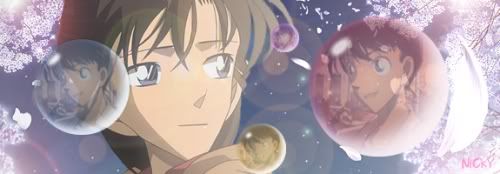
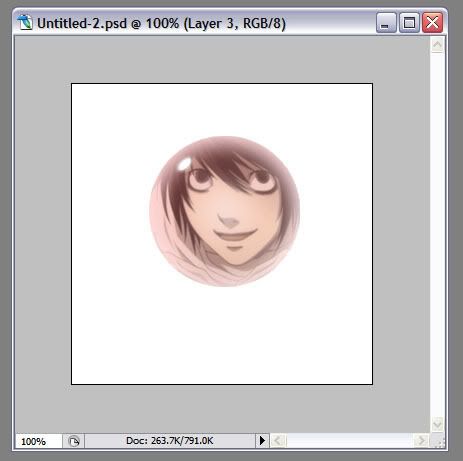
 ok i finally decided to make a tutorial. let's make bubbles and put something inside them lol like in my siggy first, go to file >>> new. and cchoose a pic u wanna use too. i'll use the pic of L since im so into Death Note right now xD 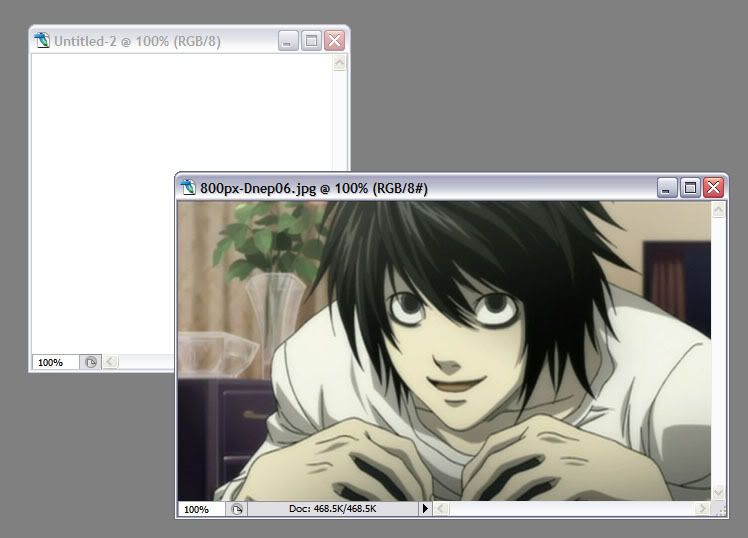 actually u can just follow these screencaps, but ill write some descriptions too just in case^^ create a new layer (layer 1) 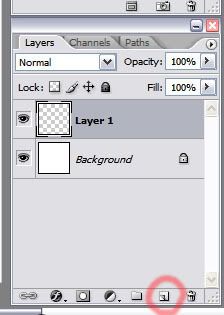 then 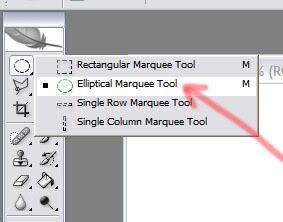 hold down the shift key to get a perfect circle 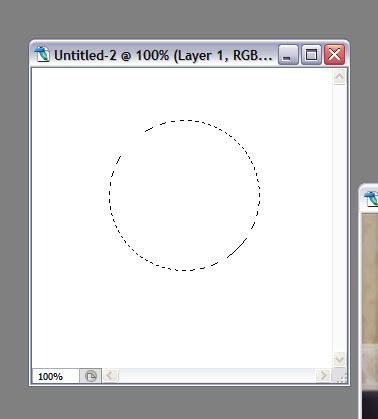 put a color in a circle, any color^^" 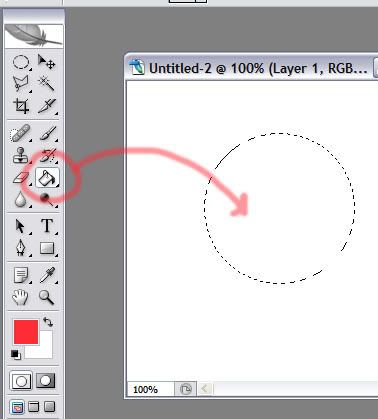 and it should look something like this 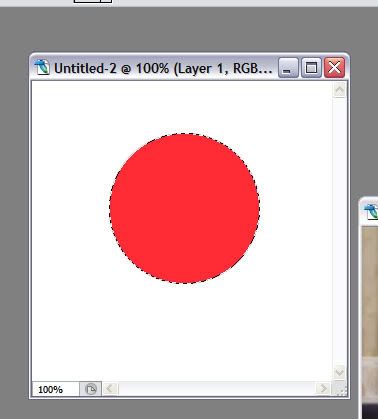 then, right click on layer1 (it is somewhere down there at the right corner) and click on "blending options" 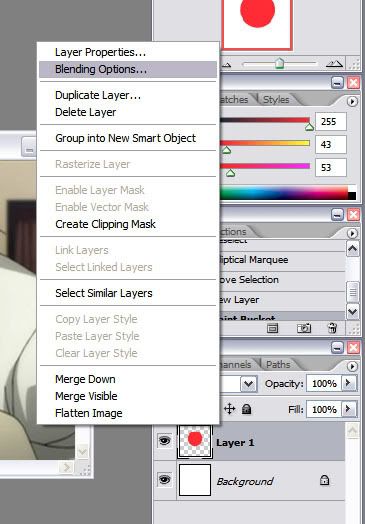 set it as in the pic below, it doesnt need to be exactly like mine  and the circle looks like this yeh? 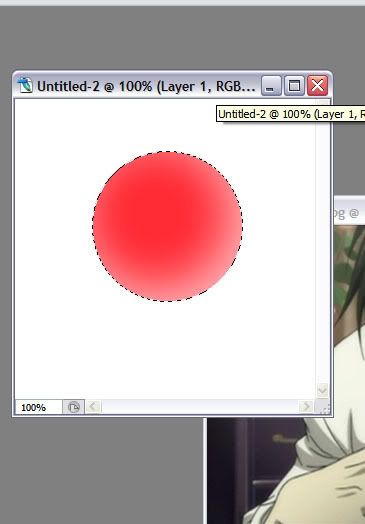 create a new layer 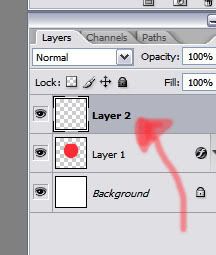 click on brush and set the diameter to be about the size of ur circle 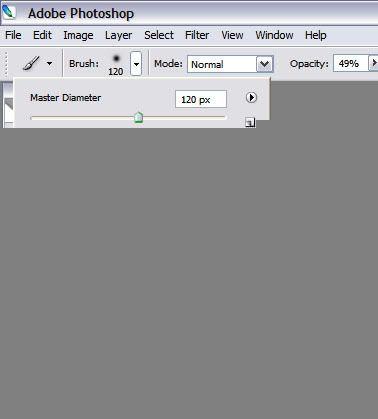 i must go now, ill continue later^^" |
|
|
|
Post by Mizuhara on Nov 15, 2006 0:22:20 GMT -5
lol...you left me in the middle...
|
|
|
|
Post by *~NiCkY~* on Nov 15, 2006 17:20:33 GMT -5
sorry >< i have all the screencaps tho, i'll finish it asap >< EDIT: hmm... looks like the last pic in my previous post is broken.. here we go click on brush and set the diameter to be about the size of ur circle & make the hardness 0% 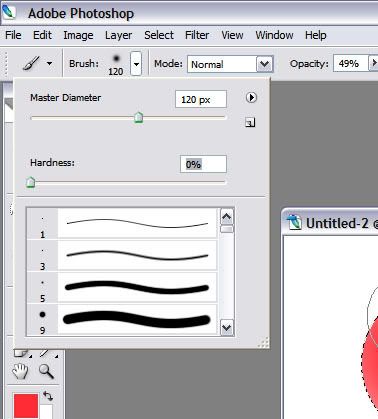 now, change the color to white 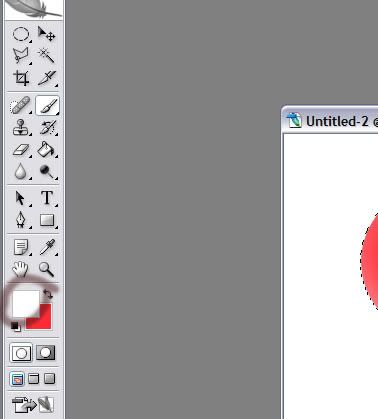 and then click just once on the picture in the middle, it would look somehow like this(just ingore the arrow and the white spot right now(i lost the screen cap of this step *-*))  add a new layer again 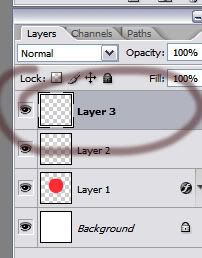 then, change the hardness of the brush to 100% and the diameter to about 15-20 px maybe? click on the "bubble", now there's a white spot somewhere like in this go back to your picture (mine is L) and make a circle about the area u wanna have in the the bubble (sorry for my funny explaination!! that's what pictures r for xD). remember to hold down the shift key so u get a perfect circle 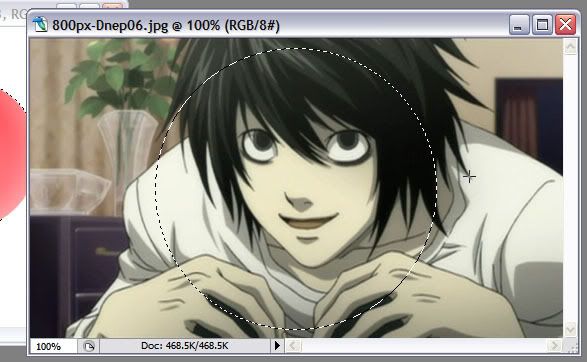 and then u just drag the circle and drop on the "bubble" lol (u dont see the bubble, it's behind the pic, dont worry xD) now u got the 4th layer 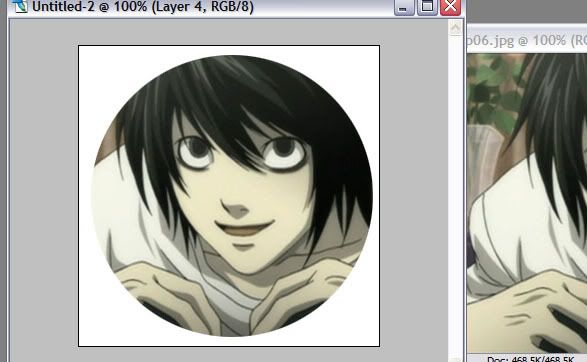 follow the pictures (lmao) 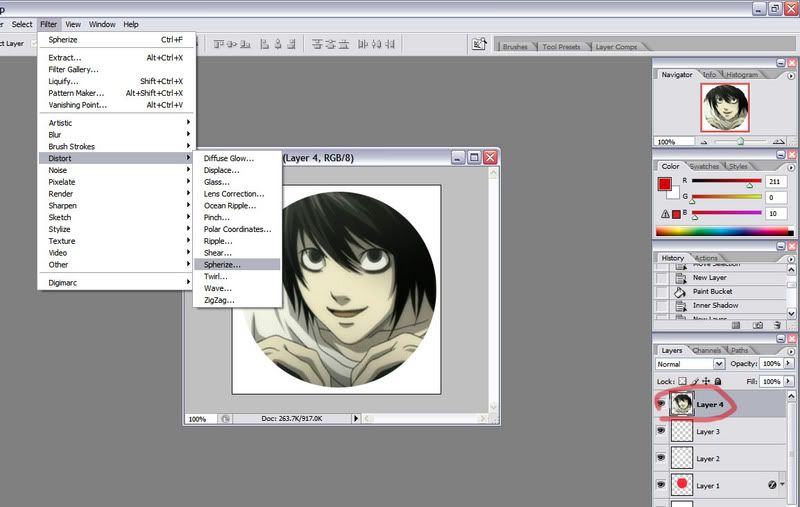 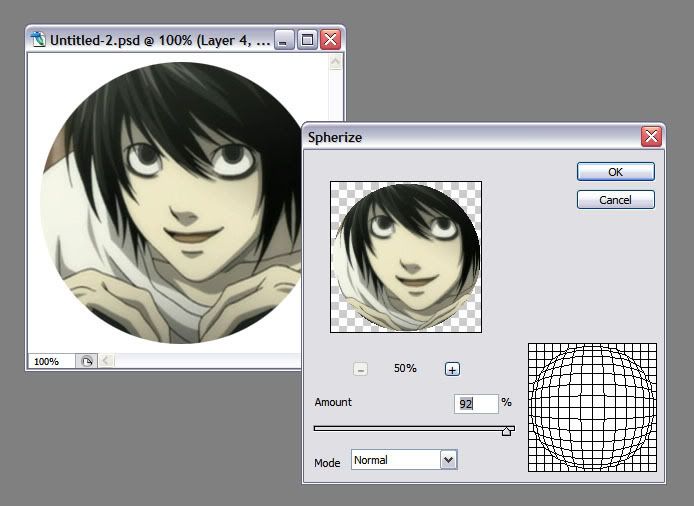 ** it doesn't have to be 92% like mine then it should look something like this 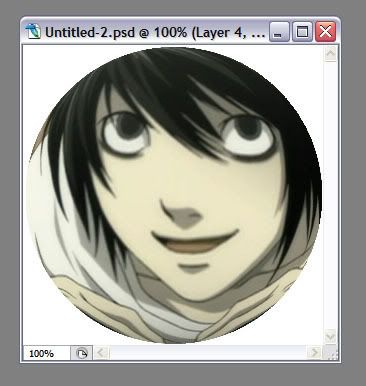 move the layer to the back, behind the bubble~  yay 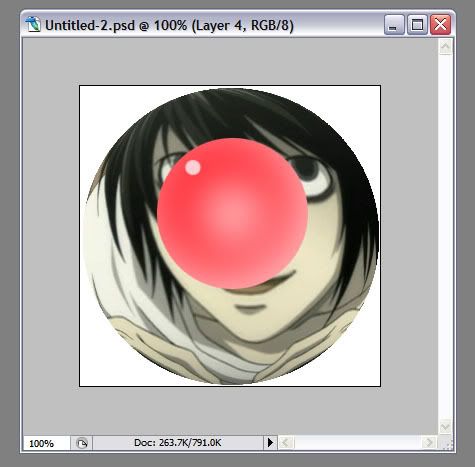 |
|
|
|
Post by Mizuhara on Nov 20, 2006 4:22:14 GMT -5
mine's didnt go very well..i think i screwed up somewher ein the middle  |
|
|
|
Post by Chugoku-jinko on Nov 20, 2006 5:10:48 GMT -5
cool tutoral nicky, I think it's better that you put hte whole tutoral on one post, it's easier for everyone =3
|
|
|
|
Post by *~NiCkY~* on Nov 20, 2006 14:43:55 GMT -5
actually, im not done yet..
yea ^i think it's easier to put in one post too..
but it would make a long page so i decided to divided it into several posts hehe
sorry for not finishing it at once!! ill finish it ASAP (again = =")
would it be better if i combined them and put them into my first post? =3
|
|
|
|
Post by *~NiCkY~* on Nov 20, 2006 15:00:26 GMT -5
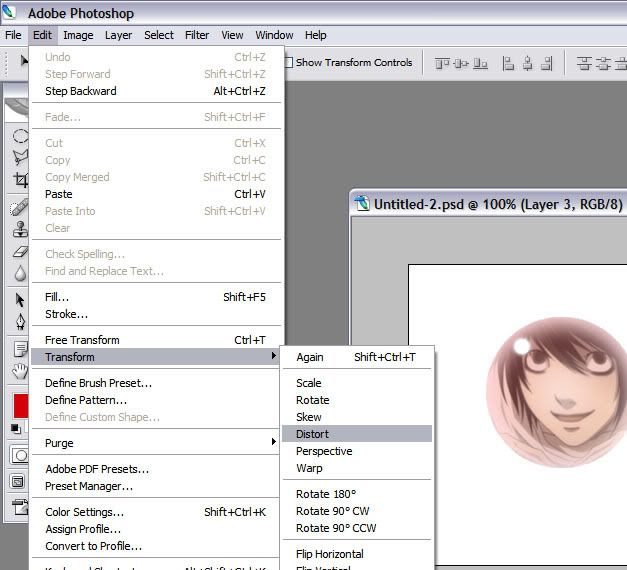
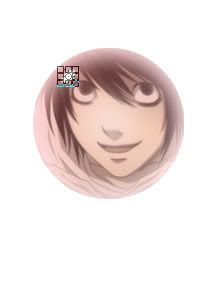
continued (sorry for the screw-up - -"): reduce the ocapacity of the bubble, now u can see thru it right? 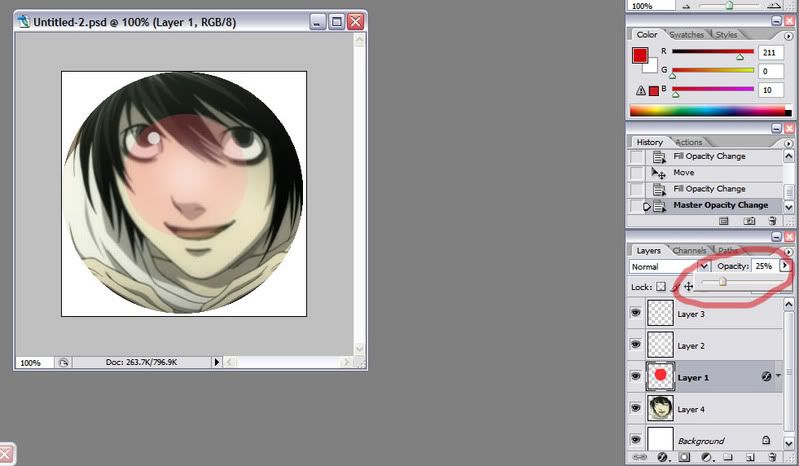 select layer 4 (the pic of L) follow the pic lol 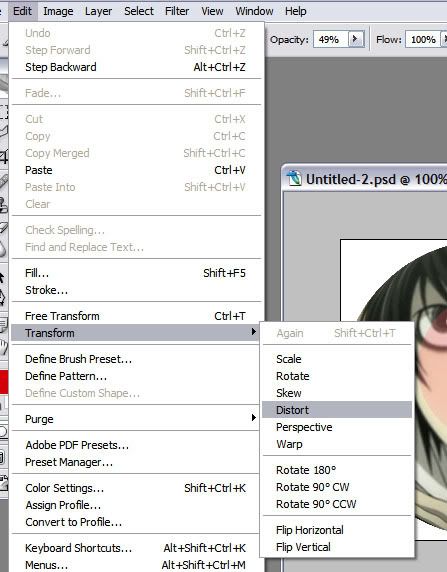 try to get it into the bubble =3 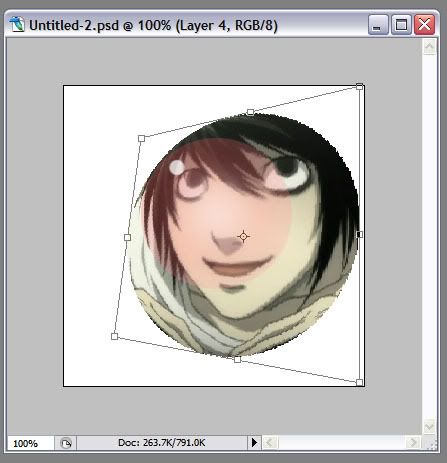 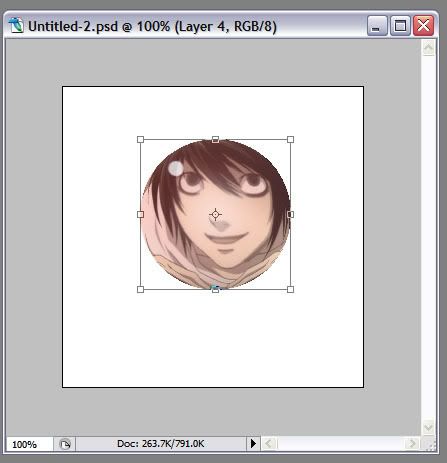 make a circle around L's face again, this time a bit smaller 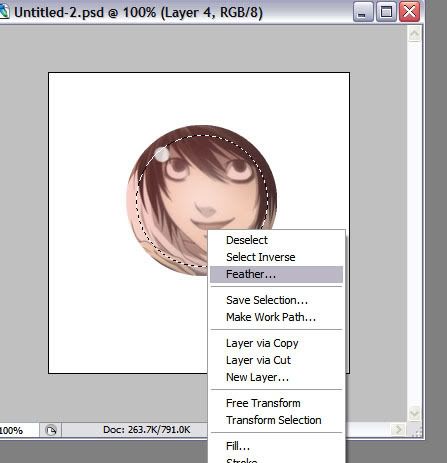 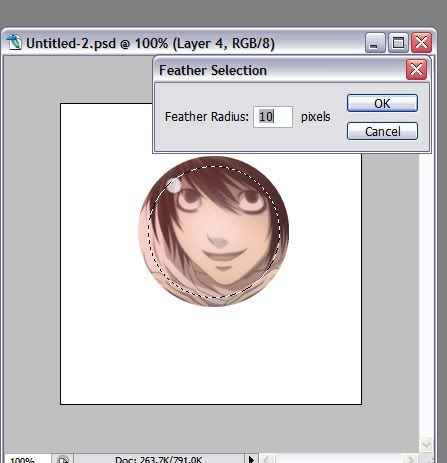 right-click -> layer via copy 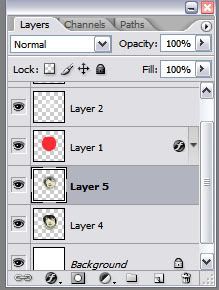 now that u got the layer 5, just delete the layer 4 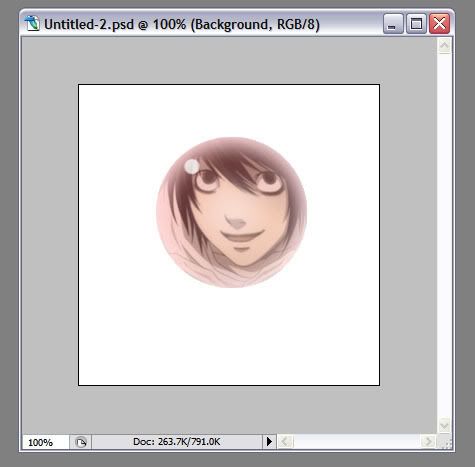 back to layer 3, right-click -> blending options 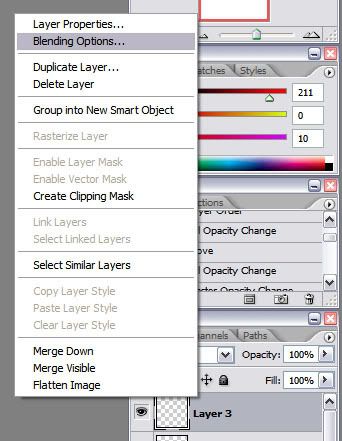  go to edit > transform >> distort reshape that small white spot to make it look more like a light reflection now i gotta say sorry again!! im at school and these r the pic i uploaded at home just found that i havent uploaded all the screencaps T^T ill really so finish it as soon as i get home honto gemen!! |
|
|
|
Post by *~NiCkY~* on Nov 20, 2006 18:29:58 GMT -5
   u can reduce the ocapacity of layer 5 too if u want 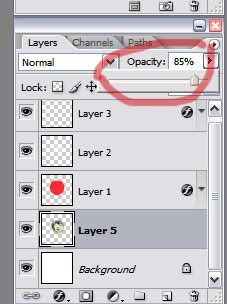 find a background 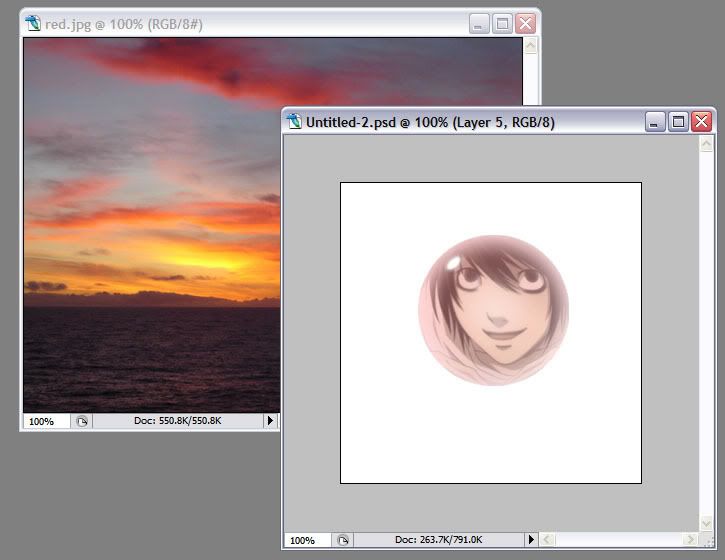 just "drag and drop" it behind the layer 5  make a circle the size of the bubble 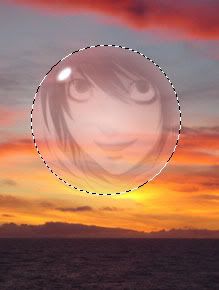 filter > distort > spherize 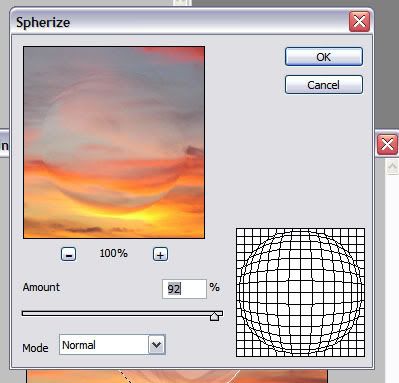 and done  note: actually there r many more steps than i show u but i dont remember what they r = =" so i just show u the necessary ones^^" |
|
|
|
Post by Mizuhara on Nov 22, 2006 3:00:29 GMT -5
k..here is my result  |
|
|
|
Post by Haibara on Dec 3, 2006 5:29:11 GMT -5
thanks a lot!
|
|
|
|
Post by Clau :) on Nov 1, 2007 0:04:51 GMT -5
Very nice effect! Thanks!
|
|
zard
New Detective

Posts: 1 
|
Post by zard on Sept 11, 2008 2:09:26 GMT -5
Thanks !
NiCkY san ¡ I will try ^^
|
|
|
|
Post by Kaito-Hacker on Sept 11, 2008 19:56:52 GMT -5
that's so cool, and it's a nice thing to do.
|
|
|
|
Post by Meitantei Lucy on Sept 12, 2008 13:40:53 GMT -5
If you don't have anything usefull to say, don't post in old threads.
|
|
Kally
New Detective
I <3 Kaitou Kid-sama
Posts: 2
|
Post by Kally on Aug 30, 2009 3:59:26 GMT -5
Hi TS,
I'd like to ask how you got that white shiny effect at the bottom of those bubbles in your siggie... As I'm trying to replicate that effect... And failing badly...
Btw, this tutorial is very cool +w+
|
|