|
|
Post by Kazuha on Apr 18, 2005 10:48:52 GMT -5
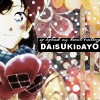
Ohhh~ Thank you so much Ka-chan! That's awesome! It worked good and I made some changes like more shadow and stuff ^_^ *proud* But I have a question step 9Make a new layer and add something you want ^_^ I make it like this :  How to add something? sorry, but I'm stupid _._ |
|
|
|
Post by .::ka::. on Apr 18, 2005 11:19:17 GMT -5
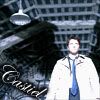
Oh, it mean you can add more thing to make your pic more fantasic ^^ For example, I used brush to draw those sparke thing beside Ran, see ?!  |
|
|
|
Post by Kazuha on Apr 18, 2005 12:27:18 GMT -5
Ah okay .. can please someone tell me how to do that?
I can't figure out how to use the brush thingies..
|
|
|
|
Post by Meitantei Lucy on Apr 18, 2005 13:30:55 GMT -5
Gomen ne ! Here's the tutorial >.< I'm really sorry Step 1 After open the image, choose that tool : 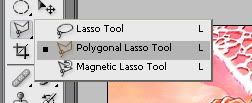 Step 2 Step 2 The draw something like : 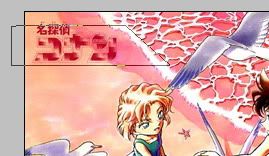 Step 3 Step 3 After you draw that, right click on the background layer and choose 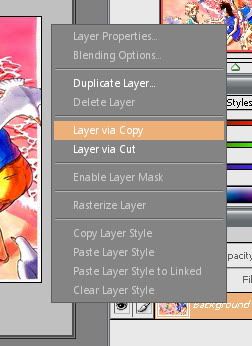 Then there will be a new layer which have a piece of original pic ^^ Okay, now draw more frames and do the same like step 3 STep 4 When you've done all, click at background layer then press ctrl-u... There will be a new windows, check color rize box then choose the color you like 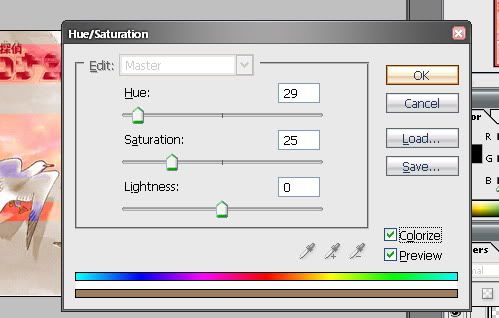 Step 5 Step 5Now, with every layer which has piece of original pic, right click then choose BLENDING OPTIONS. A new window will be open  Choose Stroke, then choose the color you like adn size, you may check "Drop shadow" box to make it more real Do the same with all layer has piece, and this is how it works : 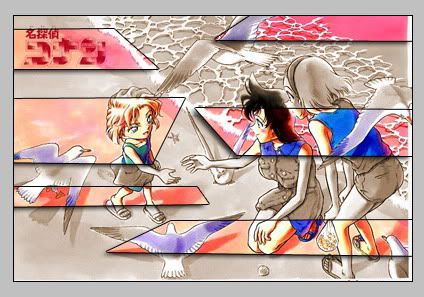 Ka-chan, I got the image to be gray now, but even if I chooese color and so for the layers, they won't appear on the image... Please help me  |
|
|
|
Post by .::ka::. on Apr 18, 2005 13:34:59 GMT -5
Ka-chan, I got the image to be gray now, but even if I chooese color and so for the layers, they won't appear on the image... Please help me Uhm, I still can't get it ?!  Now you have the original pic to be gray, right?! What "even if I choose color and so for the layers, they won't appear on the image" mean ?! I don't understand ?! You choose color for what layer ?! |
|
|
|
Post by Meitantei Lucy on Apr 18, 2005 13:53:49 GMT -5
Kazu is helping me^^''
But... It's that "blending options" - "stroke" and "drop shadow" that doesn't change my image at all... I can't gte the cutted pieces to appear on my image....
|
|
|
|
Post by Kazuha on Apr 18, 2005 14:29:02 GMT -5
I dunno what's wrong, maybe you can find out Ka-chan: usera.imagecave.com/Janni/gahh.JPGIf she presses ctrl+u and moves these thingies, there is no change in the color. I thought it could be because her cutted pieces aren't allright, but thes are like she said .. I can't get what's working wrong |
|
|
|
Post by .::ka::. on Apr 18, 2005 22:17:59 GMT -5
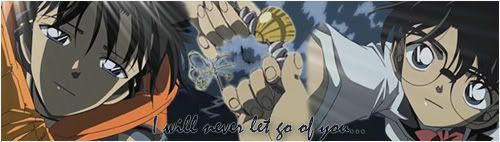
I dunno what's wrong, maybe you can find out Ka-chan: usera.imagecave.com/Janni/gahh.JPGIf she presses ctrl+u and moves these thingies, there is no change in the color. I thought it could be because her cutted pieces aren't allright, but thes are like she said .. I can't get what's working wrong Maybe this, You are right, Kazu-chan, her cutter pieces arent't alright... Take a look of this This is Janni's pic. Her layers isn't show the pieces ![]() img.photobucket.com/albums/v696/syaokizz/sak.jpg[/IMG] img.photobucket.com/albums/v696/syaokizz/sak.jpg[/IMG]And this is my pic : On the layer have a piece, can you see it ?! 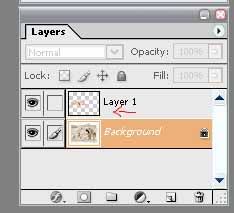 And this is how it make : 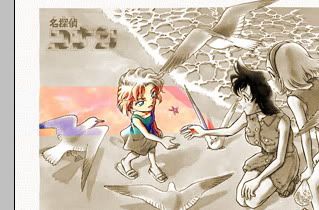 So, since there's nothing on the layer you can't stroke, or dropshadow ... I think, this is a reason ^^ |
|
|
|
Post by Angie on Apr 20, 2005 5:59:22 GMT -5
The tutorial I promised Janni-chan: how to make animation/gif with Adobe ImageReady. I'm actually making an avatar, and decided to use it for the tutorial XP Step 1: In Photoshop, prepare your images in separate windows.  Step 2 Step 2: Copy and paste them on each other [in the right order]. (Actually, I'm not very sure if they should be in the right order, but do it just in case.) See the layer palette on how it should turn out.  Step 3 Step 3: Now you're ready to make animation. Click on the "Jump to ImageReady" button.  Step 4 Step 4: Make sure your animation palette is open. If it isn't, go to Windows -> Animation. Step 5: On the layer palette, there's a small icon of an eye (circled in red), the layer visibility. Click on each one of the layer except the last one (Layer 1) so it remains visible.  Step 6 Step 6: Click on the new slice icon on the animation palette, then click on the layer visibility icon of Layer 2 so that it appears again. Do the same thing over for Layer 3, and so on till the last image has reappeared.  Not done yet... |
|
|
|
Post by Angie on Apr 20, 2005 6:39:45 GMT -5
From Step 6:  Step 7 Step 7: Now, you have a whole row of images in the animation palette.  Set the time delay of each image by clicking on "0 sec". (I chose 1 second for mine.)  Or to quickly set all of them to the same time, click on the small arrow at the top right corner so that a menu pops up. Select "Select All Frames" (or something like that), then click on the time delay and set it. Step 8: Test the animated image! Click on the Play button (shown below) to see how it turns out.  Step 9 Step 9: When you're satisfied with it, go to File -> Save Optimized As. You can only saved it as gif file with that! Normal saving won't do any good.  Step 10 Step 10: You're done! ^^ |
|
|
|
Post by Angie on Apr 20, 2005 6:44:26 GMT -5
This is how it turned out:  |
|
|
|
Post by Meitantei Lucy on Apr 20, 2005 11:08:17 GMT -5
Thanks for your help Angie!!^^
And Ka-chan and Kazu-chan, thanks for your help, but it won't work to me T__T
|
|
|
|
Post by Kazuha on Apr 21, 2005 8:29:38 GMT -5
Oh ... sorry Janni-chan ....
and I'm still waiting for an explanation ^^''''
|
|
|
|
Post by Meitantei Lucy on Apr 21, 2005 10:58:56 GMT -5
What explaination?
|
|
|
|
Post by Kazuha on Apr 21, 2005 11:05:24 GMT -5
How to use brushes ^^'''
You know, I'm a total newbie so I don't have any idea how to use photoshop....
|
|