Post by supak on Jan 19, 2007 21:35:06 GMT -5
NOTE: This is for Photoshop users only, CS+ preferred.
Start by making a new document with the following dimensions, or whatever dimensions you want.

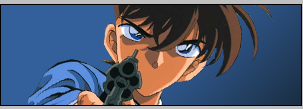
Then find a picture you would like to use, I'm going to use a picture of Shinichi I found on Google.
Using the polygonic lasso tool, carefully outline the render and copy it onto the new document you created in the begining.
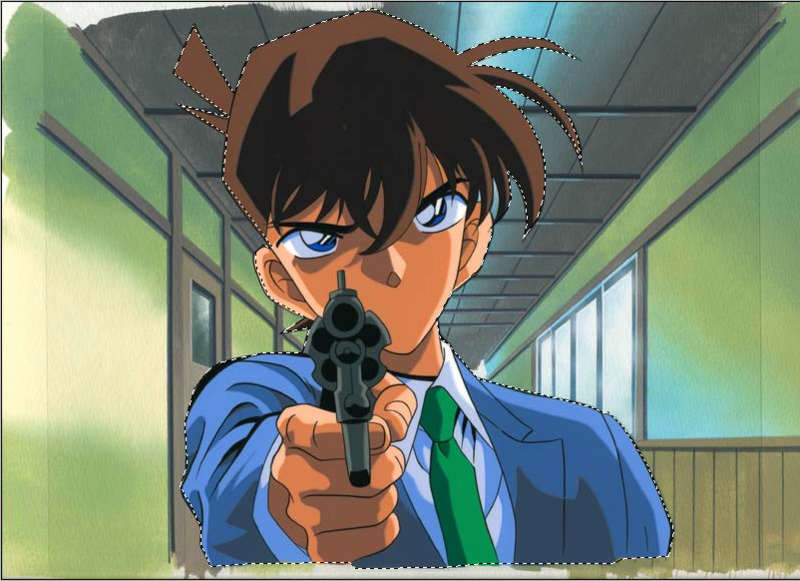
Or you can use the magic wand tool and erase the space around the render if the image space around the render is one color.
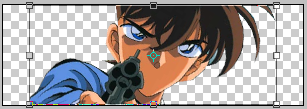
After you have your render copied onto your sig document, press "CTRL+T" to resize the image if needed. You can also rotate the image a bit if you want, like I have done. To make the proportions correct when resizing, hold shift and drag it from the corner to whatever size you want.
Take out your eyedropper tool (I) and select a good color for your background. Press (X) and then select a second color. I prefer darker colors, they seem to look better.

Alright, you got your colors. Now press "CTRL+SHIFT+N" to bring up a new layer menu. Name this layer "Background" and drag it to the bottom of your layer list. Next, take out your gradient tool and create a nice, even background by holding "SHIFT" and dragging.
Looking nice? Hardly. Let's continue.
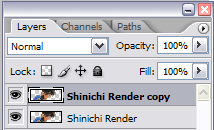
Duplicate the render layer by pressing "CTRL+J".
Take out your smudge tool with your favorite smudge settings, or use the following which I am going to use:
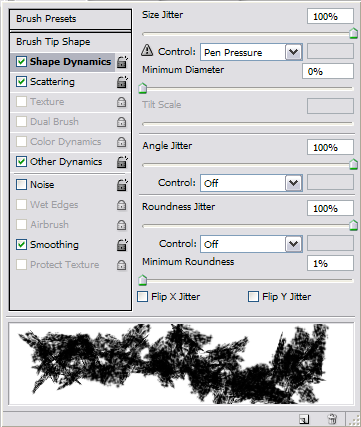
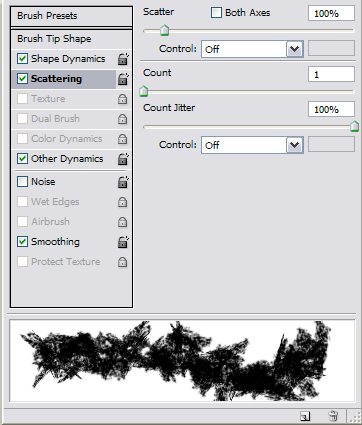
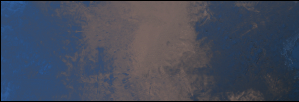
Alright, finally time to work! Set the original render layer, or whatever is above the background layer, to invisible. You do this by clicking the little eyeball to the left of the layer. Then go to the other layer you duplicated earlier and smudge it around with your smudge brush. Smudge in a circular motion. Smudge around the whole canvas.
Your canvas should now look like this:
Now set the smudged layer to "Color Dodge" which is located in the blending options scrolldown menu.
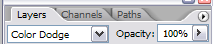
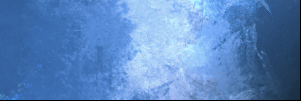
Your canvas should now look like this:

Looking better. Now, click onto the original render layer, you know, the one you set invisible? Duplicate it again by pressing "CTRL+J"
Set the layer you just created to uninvisible, then smudge it again. This time don't smudge it all around the canvas, only a bit around. It should look like this:
Now you have two choices from here:
1) Continue on with the next step
2) Smudge another layer of the original render, making it a total of three smudge layers and five layers total. (Three smudge, One background, One invisible original render)
I am going to go ahead and make another smudge layer, but since it looks too strong I'm setting the blending option to "Overlay".

Alright, enough smuding for now! ;D
After you finished smudging, we must get to work on the render. Uninvisible the render and bring it up to the top of your layer list.
Use the magic wand tool (W) and select the outside space of the render, select multiple areas by holding "SHIFT" and clicking.
Once you selected the outside of the render, right click with the magic wand tool and select "FEATHER". Set feather to five to ten and press "OK".
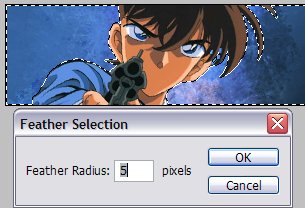
Once you have done that, press "DELETE" on your keyboard one to two times to make the outline of the render blend in with the background a bit more.
Alright, looking better, looking better.
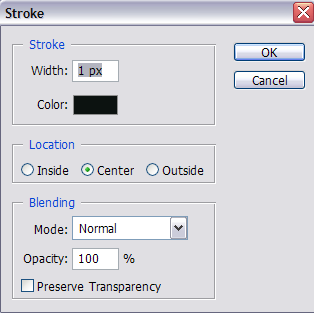
Next, let's add a stroke to the signature. I find a stroke to be a must have with all signatures. What is a stroke? No, not that thing your grandparents get, the little black outline that is... Well on the outline of your sig. It gives the signature a complete look. This is a very simple step.
You create a new layer by pressing "CTRL+SHIFT+N" then name the layer "Stroke". Select the new layer and press "CTRL+A" to select the outline of the canvas. Then go to the top of your screen and select "EDIT" to the right of "FILE". Once you are at "EDIT" select "STROKE" and set to 1 Pixel.
Done yet? Silly rabbit. Not yet! We need to add text and a couple more effects to the sig.
Let's begin with some extra effects. First create a new layer and name it "APPLY IMAGE". Select this new later and go to the top of your screen again and select "IMAGE" to the right of "EDIT". From there, select "APPLY IMAGE". Use the following settings:
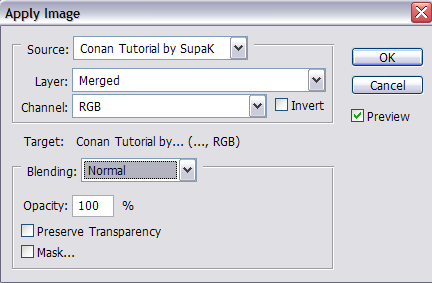
This creates a copy of the entire signature at your current state on the layer you created.
Next, move the "APPLY IMAGE" layer beneath the "STROKE" layer.
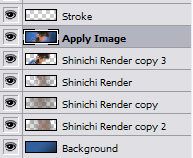
Your layer menu should now look something similar to that.
Now, go to the "APPLY IMAGE" layer and select "FILTER" from the top of the screen. This is to the right of "SELECT" and to the left of "VIEW".
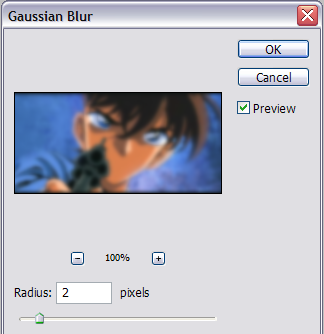
Next select the "BLUR" option, after that select "GAUSSIAN BLUR".
Use the following settings, or whatever you see fits best.
Next, select "EDIT" from the top of the screen. This is to the right of "FILE". After that, select "FADE GAUSSIAN BLUR".
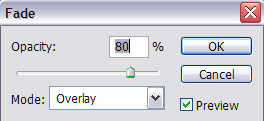
You can use whatever setting you like, but those are what I used. Once you select your settings, press "OK". This gives the sig a slight blur, a slight dreamy or hazy effect that looks good.
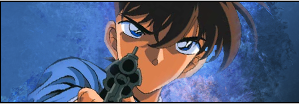
My signature now looks like this:
Now to add text! You can do whatever you want with text, be creative. I'm going to use the pen tool to manipulate the direction the text travels in.
If you want to do this, first take out the pen tool (P). Create a new layer with "CTRL+SHIFT+N" and name it "PEN". Draw the outline where you want your text to travel on that layer.

That big blob of color? Don't worry about it, just set the "PEN" layer to invisible, it should be gone.
However, there should still be thin line in which you want your text to travel. Take out the text tool "T" and click on the line, a blinking cursor should appear where you can type your text.
Go ahead and type in whatever you want. You can download some nice fonts at dafont.com I just used plain Arial as text. Sometimes the best text is the plain text!
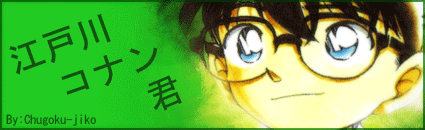
Alright, you're done! Have a good time showing off your brand new signature.
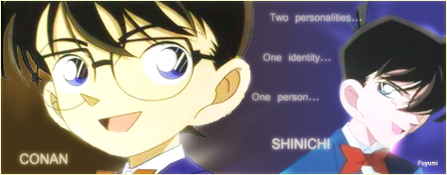
And the final result:
FAQ:
Q) What is a render?
A) The picture you use for your signature.
Q) What program do you use?
A) Photoshop CS2
Q) Are you taking requests?
A) If I feel like it.
Q) What do you save your images as?
A) .PNG
Q) Where do you host your images?
A) Photobucket.com
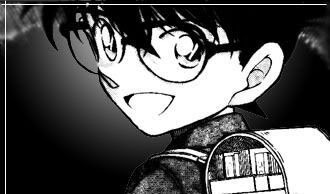
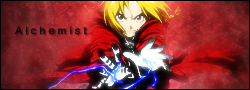
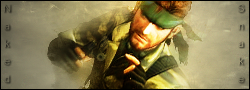
Other outcomes with added effects:
This was a tutorial by SupaK. You may not duplicate or copy the contents of this tutorial without my permission. This is to be posted at Nintendo Nsider Forums by my account, SUPAKOOPA6 (Total Posts: 11614, Date Registered: Date Registered 12-23-2003 10:05 PM) and the Detective Conan forums by SupaK.
So how was the tutorial? ;D My first tutorial in years.
Start by making a new document with the following dimensions, or whatever dimensions you want.
Then find a picture you would like to use, I'm going to use a picture of Shinichi I found on Google.
Using the polygonic lasso tool, carefully outline the render and copy it onto the new document you created in the begining.
Or you can use the magic wand tool and erase the space around the render if the image space around the render is one color.
After you have your render copied onto your sig document, press "CTRL+T" to resize the image if needed. You can also rotate the image a bit if you want, like I have done. To make the proportions correct when resizing, hold shift and drag it from the corner to whatever size you want.
Take out your eyedropper tool (I) and select a good color for your background. Press (X) and then select a second color. I prefer darker colors, they seem to look better.
Alright, you got your colors. Now press "CTRL+SHIFT+N" to bring up a new layer menu. Name this layer "Background" and drag it to the bottom of your layer list. Next, take out your gradient tool and create a nice, even background by holding "SHIFT" and dragging.
Looking nice? Hardly. Let's continue.
Duplicate the render layer by pressing "CTRL+J".
Take out your smudge tool with your favorite smudge settings, or use the following which I am going to use:
Alright, finally time to work! Set the original render layer, or whatever is above the background layer, to invisible. You do this by clicking the little eyeball to the left of the layer. Then go to the other layer you duplicated earlier and smudge it around with your smudge brush. Smudge in a circular motion. Smudge around the whole canvas.
Your canvas should now look like this:
Now set the smudged layer to "Color Dodge" which is located in the blending options scrolldown menu.
Your canvas should now look like this:
Looking better. Now, click onto the original render layer, you know, the one you set invisible? Duplicate it again by pressing "CTRL+J"
Set the layer you just created to uninvisible, then smudge it again. This time don't smudge it all around the canvas, only a bit around. It should look like this:
Now you have two choices from here:
1) Continue on with the next step
2) Smudge another layer of the original render, making it a total of three smudge layers and five layers total. (Three smudge, One background, One invisible original render)
I am going to go ahead and make another smudge layer, but since it looks too strong I'm setting the blending option to "Overlay".
Alright, enough smuding for now! ;D
After you finished smudging, we must get to work on the render. Uninvisible the render and bring it up to the top of your layer list.
Use the magic wand tool (W) and select the outside space of the render, select multiple areas by holding "SHIFT" and clicking.
Once you selected the outside of the render, right click with the magic wand tool and select "FEATHER". Set feather to five to ten and press "OK".
Once you have done that, press "DELETE" on your keyboard one to two times to make the outline of the render blend in with the background a bit more.
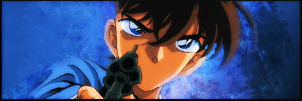
Alright, looking better, looking better.
Next, let's add a stroke to the signature. I find a stroke to be a must have with all signatures. What is a stroke? No, not that thing your grandparents get, the little black outline that is... Well on the outline of your sig. It gives the signature a complete look. This is a very simple step.
You create a new layer by pressing "CTRL+SHIFT+N" then name the layer "Stroke". Select the new layer and press "CTRL+A" to select the outline of the canvas. Then go to the top of your screen and select "EDIT" to the right of "FILE". Once you are at "EDIT" select "STROKE" and set to 1 Pixel.
Done yet? Silly rabbit. Not yet! We need to add text and a couple more effects to the sig.
Let's begin with some extra effects. First create a new layer and name it "APPLY IMAGE". Select this new later and go to the top of your screen again and select "IMAGE" to the right of "EDIT". From there, select "APPLY IMAGE". Use the following settings:
This creates a copy of the entire signature at your current state on the layer you created.
Next, move the "APPLY IMAGE" layer beneath the "STROKE" layer.
Your layer menu should now look something similar to that.
Now, go to the "APPLY IMAGE" layer and select "FILTER" from the top of the screen. This is to the right of "SELECT" and to the left of "VIEW".
Next select the "BLUR" option, after that select "GAUSSIAN BLUR".
Use the following settings, or whatever you see fits best.
Next, select "EDIT" from the top of the screen. This is to the right of "FILE". After that, select "FADE GAUSSIAN BLUR".
You can use whatever setting you like, but those are what I used. Once you select your settings, press "OK". This gives the sig a slight blur, a slight dreamy or hazy effect that looks good.
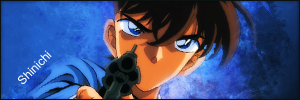
My signature now looks like this:
Now to add text! You can do whatever you want with text, be creative. I'm going to use the pen tool to manipulate the direction the text travels in.
If you want to do this, first take out the pen tool (P). Create a new layer with "CTRL+SHIFT+N" and name it "PEN". Draw the outline where you want your text to travel on that layer.
That big blob of color? Don't worry about it, just set the "PEN" layer to invisible, it should be gone.
However, there should still be thin line in which you want your text to travel. Take out the text tool "T" and click on the line, a blinking cursor should appear where you can type your text.
Go ahead and type in whatever you want. You can download some nice fonts at dafont.com I just used plain Arial as text. Sometimes the best text is the plain text!
Alright, you're done! Have a good time showing off your brand new signature.
And the final result:
FAQ:
Q) What is a render?
A) The picture you use for your signature.
Q) What program do you use?
A) Photoshop CS2
Q) Are you taking requests?
A) If I feel like it.
Q) What do you save your images as?
A) .PNG
Q) Where do you host your images?
A) Photobucket.com
Other outcomes with added effects:
This was a tutorial by SupaK. You may not duplicate or copy the contents of this tutorial without my permission. This is to be posted at Nintendo Nsider Forums by my account, SUPAKOOPA6 (Total Posts: 11614, Date Registered: Date Registered 12-23-2003 10:05 PM) and the Detective Conan forums by SupaK.
So how was the tutorial? ;D My first tutorial in years.